Showing posts with label crafts. Show all posts

Thursday, May 31, 2012

Suitcase Makeover

I recently picked up an old, ugly but functional suitcase at a neighbor's garage sale for 50 cents. I came home, cleaned it up, put the kids' off season clothes in it, and stuffed it under the bed.

The neighbor is apparently an Ebay seller that people regularly unload their junk on. She's carried over two more big 'ol ugly suitcases to me in the last couple of weeks. They do work nicely for storage. Also the price is certainly right.

Old suitcase, before painting.
I figured there must be a way to pretty them up.

I did a little googling, and ran across this awesome before and after on Instructables.

I had my husband pick up some pretty spray paint on one of his many trips to Home Depot, and got to work. I tried taping off the silver trim on the first suitcase. It was a fussy job, and in the end, it turned out sort of sloppy. (I'm going to pick up another can of that color paint, and paint the trim after all.)

For the second suitcase, I skipped the taping, and painted the whole thing. It looked much better, and took considerably less time.

Old suitcase, after painting.
It looks great. I'm going to be scavenging Goodwill from now on for more. We don't have a lot of "hidden storage," (closets and cabinets,) in our house, and these are functional and cute "visible," storage. This blue one has replaced an ugly plastic tote full of yarn in my bedroom.


Tuesday, May 1, 2012

Tie Dye Party Table

In May, the United Methodist Women's group at my church is holding a fundraiser brunch for ladies and girls. They've asked for volunteers to each take one table and decorate it in a fun theme, with some related party favors for the attendees.

I was asked to do a table, and naturally, someone suggested that my table should be tie dye themed. I decided to run with a slightly broader theme, the groovy 60's, (well, as much of the 60's as would be appropriate for a church brunch. LOL.) 


Semi precious chip necklaces.
First off, I decided everyone needed some cool beads, so I dug out my much neglected jewelry making supplies, and made some long, beaded necklaces out of semi precious chips. They're theme appropriate, but also, they're actually pretty and wearable. (I have some I wear, anyway.)


I went to the party store, and picked up some cute lollipops and buttons.

Tie dyed bandannas.
I tie dyed some bandannas, (to be used as 'do rags or head bands.)


Record bowl full of party favors.
I made some record bowls to hold everyone's goodies, which also included some fun stickers and the covered notebooks I blogged about recently.


Hobby Lobby had some adorable plates on sale, so I made a tiered cupcake stand with a dollar store candle stick.


They'll hold "tie dyed" cupcakes in tie dyed patterned liners, packaged to go, since they're apparently already serving dessert. (They're shown here unfrosted, before I pop them into the freezer for later.)


Tie dye themed party table.
I did a little trial run of the table to see how everything looked. (The table was cute, the background of my demolished kitchen in the midst of the remodel was terrible.) The place mats are made of laminated wrapping paper. The empty Starbucks bottles have a strip of the tie dyed paper glued on, and will hold a flower at each place. Apparently the church will be using their own dishes and tablecloths, in case you're wondering why I didn't use any.

I was a little nervous about doing this, since I have no idea what kind of themes everyone else has come up with, but it was fun to plan.

Monday, April 9, 2012

The Granny Square Project

As soon as anyone finds out that you crochet, they put in a request for an afghan, like their grandma used to make.

I make a fair amount of baby blankets, but in general, I don't do many adult size blankets because I have a short attention span, and tend to lose steam about a third of the way through. I think non crocheters/knitters underestimate just how long it takes to crank out a blanket.

I have realized that folks also drastically underestimate how much the materials for such a blanket cost. Even if you use the cheapest acrylic yarn available, you're still talking about probably between $30-$50 for a blanket.

This year, I've decided to try to combine something I've been getting requests for, (lots of blankets,) with something I want, (to trim down my ginormous thrifted-clearanced-inherited yarn stash.) I'm going to spend the rest of the year making granny squares, and assemble the resulting pile into however many blankets I can come up with, to give at Christmas.

Granny Squares.
In an ideal scenario, I'd have enough to make about a half dozen blankets by Christmas. I'll let you know how it goes.


Friday, March 9, 2012

Lorax Themed Sensory Bin

The Lorax has become sort of a big thing around here.

It's always been my favorite Dr. Seuss book, but with all the buzz about the movie, (which we loved, by the way,) and all the crafting and planning for V's birthday party, the book is in constant rotation around here.

I decided to scavenge through my craft stash, to see if I could put together a sensory bin for the kids to reenact the story.

Truffula trees.


The grass and Truffula trees were easy, colored rice and pom poms hot glued to pipe cleaners, (with some extra pom poms as Truffula tufts, and short pipe cleaners as tree stumps.)

Swomee Swans and Bar-ba-loots.

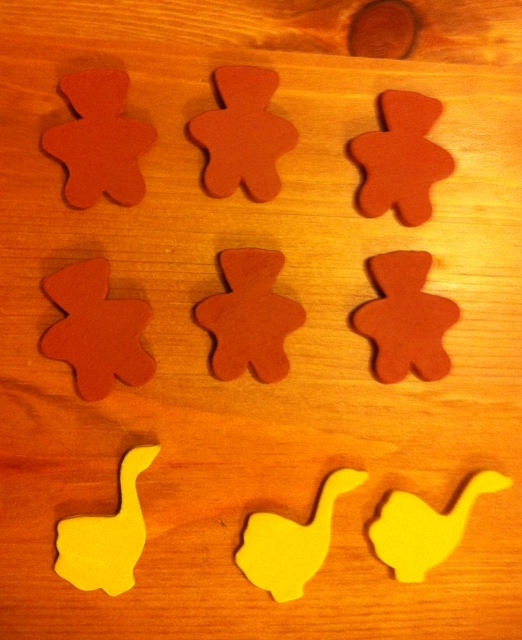
I actually found some wooden bird and bear cut outs lying around here, which I painted to use as Swomee Swans and Bar-ba-loots.

Polymer clay "humming fish."


I was at loss for what to make the humming fish out of, until I remembered I still had some polymer clay lying around. I fabricated a couple of "humming fish," which looked rather like Goldfish crackers.

The Lorax and the Onceler.


I ended up making the Lorax and the Onceler out of little wooden peg blanks. In keeping with my utter lack of painting ability, I kept it simple. They were painted with acrylic paint. I added a mustache and eyebrows to the Lorax made out of wool roving, and covered the Onceler with a layer of "miff muffered moof" made out of wool roving as well. (Ok, I have no idea what miff muffered moof is, but since the Onceler was into the fiber arts, I'm thinking wool roving was probably appropriate.)

Lorax themed sensory bin.
Here's the whole set up. Both kids are having fun with it, repeating the story nearly verbatim.

I belatedly realized that I had forgotten the "unless" rock. I remedied that after I took the picture, with a small rock and a Sharpie.

I may try to come up with some Truffula fruit and some sort of Thneed if the kids maintain this level of interest in the story.

Photobucket

Tuesday, March 6, 2012

I am the Lorax, and I Speak for the Trees

Cat in the Hat puppets bring the story to life.


I was picked up a neat little craft kit at Target the other day in the party supply section, that included 4 blank hand puppets which looked like this:

Blank hand puppet.


The kids and I have been in  a Seussical mood lately. We've been doing Seuss-y activities for school, we saw the Lorax movie this week, and I'm in the middle of planning a massive Dr. Seuss birthday party at the end of the month.

 I decided we needed some Seuss puppets to go along with all the books I've been reading. I used Sharpies because I'm impatient, and wanted them ready for bedtime story reading the same night, but i could have, and I may yet go back and paint them with fabric paint. (I don't love that the marker didn't give a nice even coat of color, but the kids, of course, don't care.)

DIY Lorax hand puppet.
You'll note that the Cat in the Hat is missing something pretty vital, namely his hat. I'm going to make him a felt one, and glue it on.

Cat in the Hat puppet, minus his hat.
Thing 1 and Thing 2 puppets.
The kids, particularly little V loved them. The kids howled over listening to the cross old Lorax read his lines from the book, and V acted out the parts of the Things, while I did the Cat's part, and read the story.

Total cost for these was less than 3 bucks, and we're having a blast with them. For tons, (ahem, 300+ more) Seuss themed crafts, party ideas, and school stuff, check out my Seuss themed Pinterest board.

Wednesday, February 29, 2012

Going Green with Recycled Sweaters

When V was still in diapers, I made wool diaper covers for her out of felted second hand wool sweaters. As a result, I've had a tote full of random wool scraps under my bed for several years.

I'm on a new mission to declutter my house, so I decided I needed to go ahead and use 'em up. 


Inspired by projects such as this one, at This Mama Makes Stuff, I decided to make a couple of throw rugs. The kids immediately tried to take this green one that I made to go in my room, since it was so "soft and cozy," so I'm going to be making them another one to go in the play room. 


I intentionally left it sort of rustic, with raw edges, though I suppose I could have blanket stitched the edges or something. The patches are 4x8. 

This was an unbelievably simple project, but I love the way it turned out.

Tuesday, February 28, 2012

Yet Another Tie Dyed Shirt Quilt

I've been piling up old t shirts again, to make into another quilt.

Recycled t shirt quilt, prior to sewing.
(A little sidebar here: Quilt is probably not the right word for the blankets I make, since they're totally devoid of the skill and craftsmanship of a real quilt. My seams are a little wonky, and they aren't bound properly, but they're a neat way to hang on to your favorite shirts a little longer, and they are functional and cozy.)

A portion of the finished quilt on my bed.
We've all been fighting over this one. I actually backed it with a sheet, and skipped the batting this time, so it's really light, perfect for relaxing on the couch in this oddly warm weather.

Monday, February 27, 2012

Projector Crafting, Seuss Style

Cat in the Hat decoration for our Seuss party.


I ran across an old projector at Goodwill a couple of months ago, and couldn't pass it up.

I've successfully made a couple of cool t shirts for the kids, by using it as a light table. (I printed off Pokemon and Sesame street coloring sheets, placed them on the projector, placed a t shirt over the picture, and traced it with a Sharpie or fabric marker.)

V's birthday is coming up next month, and I thought I'd try my hand at making some large decorations for the party. She's having a Dr Seuss themed party.

Green Eggs and Ham


I traced some images from our favorite Dr Seuss books, (excepting the hat above, which came from here,) and onto clear plastic, and projected them onto foam core and poster board, and traced and colored them. A little time consuming maybe, but easy and the results are fun.


Thing 1 sign. Lettering to be added later.
I think I'll get my 25 bucks worth out of the projector. It has lots of crafting potential.

Monday, February 20, 2012

Stash Busting Skirt Number 1

Cool psychedelic vintage fabric.
I've come to several realizations at the same time.

  1. I have too much fabric.
  2. I need some new clothes.
  3. I miss sewing.
I decided to start out with something pretty simple, a bias skirt, made with a single pattern piece. (I'm not sure if it's even still in production, but it was a Simplicity pattern, number 7090.) The fabric is considerably older than I am, but it's been in my the fabric stash for at least 10 years. I wasn't really sure what to make with it because I figured it would be hard to make the stripes line up. (I'm not really that great of a seamstress.)


Photo credit to my 3 year old.. ;)


The skirt isn't anything super fancy, but it was made out of fabric I already had, it was a quick, enjoyable project, and I had something new to wear to church this weekend. I'm thinking I'll make a few more from this pattern. I'm envisioning it with a tank top and flip flops this summer...

Tuesday, February 7, 2012

Review & Giveaway: Valentine's Pattern Bundle by YCMT


Valentine's day is quickly approaching, but there's still time to get a little crafting in. If you're still looking for some last minute inspiration, You Can Make This has got you covered.

You'll find tons of great patterns and tutorials there, no matter what your preferred crafting medium is. The best part is that they're all downloadable for instant gratification.

Apron Knot Dress, from YCMT pattern.
I was sent the Apron Knot Dress Pattern, by Little Lizard King to review. I thought it would be fun to dust off the sewing machine, and try to crank out a little dress for V. The pattern retails for $7.25, and includes instructions for making a dress in sizes 6 months-12 years. The completed project can be worn as a tunic over leggings and a tee in cool weather, or as a sun dress in warm weather. (A neat little aside, this pattern states that you may make items for sale from this pattern. I'm not sure I have time do that much sewing at this point, but I love the idea that I could.) 


I managed to get all but the button holes done in one longish afternoon. I'd rate the pattern as fairly easy. It included many pictures, and generally clear instructions. (There was some assumption of sewing experience, though. If you've never fired up the sewing machine, it might be an ambitious project.) The sizing seemed to be right on. I made a 4T for V, and it was perfect. I'd use it again.

She loves the full, twirly skirt. 
V adored the dress. She had to put it on right away and start dancing.

You Can Make This has put together a fun package of Valentine's Day themed patterns (as pictured at the beginning of the post,) for me to give away!

One randomly selected commenter will win a package containing the following patterns:

Rosetta Bag by SisBoom (value $7.95)
DIY Dish Love Quilt by DIY Dish (value $7.95)
Crochet Hat Pattern Vintage Inspired by Kris Moore (value $5.99)
Love Elephant by DIY Fluffies (value $9.00)
Apron Knot Dress by Little Lizard King (value $7.25)

For your first, mandatory entry, leave a comment telling me which pattern you'd love to try from You Can Make This.

For additional, optional entries, you may do any or all of the following:
Follow me on Twitter.
Follow You Can Make This on Twitter.
Blog/Tweet/FB about the giveaway, up to once per day.

Please leave a comment for each entry, and don't forget to leave a way to be contacted if you are the winner.

This giveaway will end on 2/12/12, at 10 pm Central Time.


Disclosure: I was provided with the above described pattern to review, as well as the opportunity to give away a pattern bundle. No other compensation was provided.

Monday, January 30, 2012

Little House Peg Dolls

Laura Ingalls and family, at the Little House in the Big Woods.


V has been enjoying the Little House play set we've been putting together. Now that we're really into the book though, she's been complaining that our plastic settlers aren't quite right for the Ingalls family. (We didn't have any plastic children, for one thing. That would never do.)

I did some browsing on Pinterest and elsewhere, and found several sets of Little House peg dolls, which inspired me to make my own. (Go check out the peg dolls at Along the Way, and Craft Phesine, and be inspired by their steady hand and artistic ability.)


Laura Ingalls and family.
So here's my (super simple) version, which only took me oh, 700 hours, give or take. (I have shaky hands, and had to make several corrections.) The peg doll blanks came from Hobby Lobby, and were painted with acrylic paint.

If you need a set, and don't want to DIY, I found a very nicely done set on Etsy.

V is very happy to have the whole Ingalls family at her disposal now. The plastic pioneers have been relegated to occasional visitors.

Tip Junkie handmade projects


mop it up mondays

Friday, January 13, 2012

Super Easy Fabric Gift Bags

Fabric gift bags.

After we opened all the Christmas presents this year, I was struck,as I always am, by just how much trash we were left with. It was a lot. 

The cat, surrounded by Christmas trash.
In an attempt to have a slightly less ginormous pile of post Christmas trash next year, I decided to sew up some super simple, reusable little cloth bags.

Another of my famously lame photos. You get the idea though, right?


I made a 20-25 in this size, which would fit cds, movies, small articles of clothing, etc. They'll be tied with a ribbon. 

I could have gotten fancy, and added gussets and trim to the bags, but since half of our presents are missing the tags, and have torn paper by the time Christmas arrives, I figured this was fancy enough for us.


(FYI, one bandanna yields two of these small bags, with an already finished edge. You can't get any easier than that.)

I'll be making some bigger ones later.

We'll still be using some wrapping paper, especially for gifts outside our immediate family. (Most of our friends and relatives would probably just dismiss this as another one of our hippie ideas, and not reuse the bags.) 

At any rate, every little bit counts, right?

Thursday, January 12, 2012

Puzzle Rehab

We made our weekly trip to Goodwill yesterday to look for books and stuff, and L was beyond excited to find a giant Pokemon puzzle. I usually insist on counting the pieces before we buy, to avoid the disappointment that comes with finishing a puzzle, only to realize it's missing a piece or two.
This one had 200 pieces, though, and the kids were being too rowdy to let me count at the time, so we picked it up, and hoped for the best.
We put the puzzle together as a family yesterday evening, and guess what? It was missing a piece, right in the middle.


I placed a piece of paper, (though cardstock or cardboard would have been better,) under the missing piece, traced the space, and tried my (feeble) best to sketch in the missing details. The resulting replacement piece was then cut out, and laminated with contact paper. It's not perfect, but it's complete now, and the kiddo is happy with it.


(And yes, I realize this is a good bit of trouble to go to for a $1 puzzle. The boy LOVES Pokemon, though and we aren't likely to find another one of these.)

Wednesday, December 14, 2011

Even More Last Minute Gifts (With Pattern Links)

I'm still cranking out last minute gifts here, and thought I'd share the links to a couple of projects I've been working on.

Ridged crocheted scarf.
I saw the tutorial for this sort of faux knitted scarf on via Pinterest, and had to try it out. It's really neat and different looking. I love it, even if it did work up pretty slowly...


I made this little hat for a niece. It took a couple of hours start to finish, and it's super cute. I think I may make a couple of more for gifts, and then make myself one after the Christmas rush. (Slouchy Hat pattern here.)

Tuesday, December 13, 2011

Gingerbread Garland


I finally tried my hand at the cinnamon applesauce ornaments I kept seeing on Pinterest, (recipe via Martha Stewart,) and made a little garland for my kitchen. Cute, easy, and it smells great!


Gingerbread garland.
These would make really cute package decorations too...

Monday, November 28, 2011

Wreath Wall

I saw a picture on BHG of a wall of minimalist grapevine wreaths, and sort of fell in love with it. I just so happened to have several plain wreaths, and no particular talent for arranging flowers and do dads on them, so this was my sort of project. (My mother, on the other hand, makes gorgeous wreaths covered in artistically displayed do dads.I miss doing the Christmas craft shows with her.) 

Here's our version.

Lousy picture without flash, courtesy of my iPhone.


I think I'm going to pick up a couple of more large wreaths the next time I hit up Hobby Lobby, but I really like the way this turned out.

Tuesday, November 22, 2011

Easiest Burlap Wreath Ever

I promised some more burlap crafts a while back. Here's an easy one.


I started with a foam wreath base from the Dollar Tree, and covered it with strips of burlap cut from an old sugar bag. (I used hot glue to secure it.)


I used some ribbon I already had lying around to make a bow, and well, that's it. I told ya' it was easy.


The result is pretty minimalist, but I'm sort of liking that look right now.


(We're still working on the kitchen/dining room renovations, and there is stuff everywhere. Minimalism is looking better and better...)

Total cost for this project: $1.