Showing posts with label sew. Show all posts

Wednesday, February 29, 2012

Going Green with Recycled Sweaters

When V was still in diapers, I made wool diaper covers for her out of felted second hand wool sweaters. As a result, I've had a tote full of random wool scraps under my bed for several years.

I'm on a new mission to declutter my house, so I decided I needed to go ahead and use 'em up. 


Inspired by projects such as this one, at This Mama Makes Stuff, I decided to make a couple of throw rugs. The kids immediately tried to take this green one that I made to go in my room, since it was so "soft and cozy," so I'm going to be making them another one to go in the play room. 


I intentionally left it sort of rustic, with raw edges, though I suppose I could have blanket stitched the edges or something. The patches are 4x8. 

This was an unbelievably simple project, but I love the way it turned out.

Tuesday, February 28, 2012

Yet Another Tie Dyed Shirt Quilt

I've been piling up old t shirts again, to make into another quilt.

Recycled t shirt quilt, prior to sewing.
(A little sidebar here: Quilt is probably not the right word for the blankets I make, since they're totally devoid of the skill and craftsmanship of a real quilt. My seams are a little wonky, and they aren't bound properly, but they're a neat way to hang on to your favorite shirts a little longer, and they are functional and cozy.)

A portion of the finished quilt on my bed.
We've all been fighting over this one. I actually backed it with a sheet, and skipped the batting this time, so it's really light, perfect for relaxing on the couch in this oddly warm weather.

Monday, February 20, 2012

Stash Busting Skirt Number 1

Cool psychedelic vintage fabric.
I've come to several realizations at the same time.

  1. I have too much fabric.
  2. I need some new clothes.
  3. I miss sewing.
I decided to start out with something pretty simple, a bias skirt, made with a single pattern piece. (I'm not sure if it's even still in production, but it was a Simplicity pattern, number 7090.) The fabric is considerably older than I am, but it's been in my the fabric stash for at least 10 years. I wasn't really sure what to make with it because I figured it would be hard to make the stripes line up. (I'm not really that great of a seamstress.)


Photo credit to my 3 year old.. ;)


The skirt isn't anything super fancy, but it was made out of fabric I already had, it was a quick, enjoyable project, and I had something new to wear to church this weekend. I'm thinking I'll make a few more from this pattern. I'm envisioning it with a tank top and flip flops this summer...

Friday, January 13, 2012

Super Easy Fabric Gift Bags

Fabric gift bags.

After we opened all the Christmas presents this year, I was struck,as I always am, by just how much trash we were left with. It was a lot. 

The cat, surrounded by Christmas trash.
In an attempt to have a slightly less ginormous pile of post Christmas trash next year, I decided to sew up some super simple, reusable little cloth bags.

Another of my famously lame photos. You get the idea though, right?


I made a 20-25 in this size, which would fit cds, movies, small articles of clothing, etc. They'll be tied with a ribbon. 

I could have gotten fancy, and added gussets and trim to the bags, but since half of our presents are missing the tags, and have torn paper by the time Christmas arrives, I figured this was fancy enough for us.


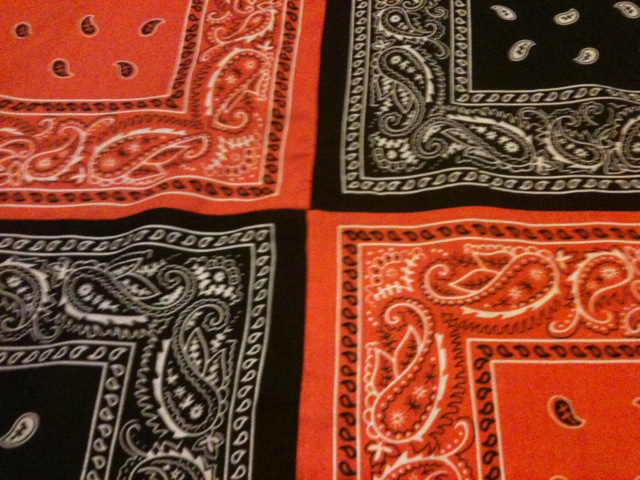
(FYI, one bandanna yields two of these small bags, with an already finished edge. You can't get any easier than that.)

I'll be making some bigger ones later.

We'll still be using some wrapping paper, especially for gifts outside our immediate family. (Most of our friends and relatives would probably just dismiss this as another one of our hippie ideas, and not reuse the bags.) 

At any rate, every little bit counts, right?

Friday, November 18, 2011

Rice Packs for Gifts

I dusted off my poor neglected sewing machine today while the kiddos were watching a Pokemon video, and whipped up a couple of little gifts.


I'd been meaning to make some rice filled heat packs for a while. They're such a simple, inexpensive gift, but really nice and practical. These are a fairly self explanatory project, but there's a nice tutorial at Elm Street Life.

Rice pack handwarmers.


I'd never thought of making rice pack hand warmers, (to go in your coat pockets,) but after seeing several variations on Pinterest, (like this one, at Jane Avion,) I decided they'd make clever little stocking stuffers. I think I'll tie them up with ribbon, and add a little tag with instructions, (since at first glance, they just look like bean bags...)


These are great assembly line projects.

Saturday, September 10, 2011

Hipster Dog Blanket

I'm in the process of upcycling a huge pile of old t shirts we had lying around. For some reason, I have a hard time tossing my beloved band t shirts, or the tie dyed shirts that I've made.

I'm working on a big project, a t shirt quilt for my nephew, but I had some scraps lying around, and decided to make a blanket for our always shivering chihuahua.

Dog blanket made of recycled t  shirts, as modeled by my cat.

Now maybe he'll quit trying to sleep on my head at night. Probably not, but maybe.

Not to be outdone, the cat has a new blankie to go inside her tent.

Spoiled cat on a granny square blanket.
I'd like to make a blanket for our big dog, but I'd have to make it out of Kevlar or stainless steel. She eats everything...

The dogs, mauling the cat's tent.

Friday, September 9, 2011

Easy $6 Halloween Tablecloth

Bandanna tablecloth.
I dusted off my sewing machine, (literally, I haven't sewed in months,) and whipped up a bandanna tablecloth for Halloween. It's an instant gratification project, the edges are already hemmed. (The bandannas didn't line up perfectly, because they aren't exactly square, but who cares, right?)

Bandanna tablecloth, as shown in my partially demolished kitchen.


I sort of like this idea for other holidays too...

Wednesday, December 8, 2010

A few more finished projects

If I've been posting less, it's because I've been doing more. More cooking, more crafting with the kids, more sewing and crocheting, as I try to finish up some last minute projects.
I recently finished up a dog blanket for our tired old dog, who likes to curl up under the kitchen table to hide from the kids and the puppy. Merry Christmas to her.

(No, I didn't block it. It's for the dog, after all. )

I finally finished sewing some pj pants for the kiddos.

Here are a pair for L, made from some fabric I dyed way back when.


I made a couple of pairs for V too.


I've even managed to finish the doll blanket I posted about a couple of days ago. I'm going to try to whip up a mattress for the doll bed in the next day or so, and then I'll post about it.

What are you working on these days?

Monday, November 22, 2010

Felt Photo Envelope

The rule in our family the last few years has been generally no gifts for the adults. Just as well, I suppose. The family keeps getting bigger, and the budget keeps getting smaller.
I make a few little exceptions though. One of them is a stack of photos of the kids over the previous year for aunts, uncles, and grandparents. Among the grandparents particularly, this seems to be one of the most highly coveted gifts of all.
This year I wanted a nicer presentation than just an envelope, but didn't feel like making photo albums or scrapbooks, as I have in previous years.
This was my compromise.


As usual, the picture is wonky, but the project is not. :)

It's a  felt envelope, embellished with a little machine embroidery, and trimmed with a vintage button. Easy, and quick to make, (I made several this evening,) but I think it turned out cute.
You could make a similar little envelope to dress up your gift cards too.

Friday, November 12, 2010

Easy Felt Food

Several days ago, I dropped a link to these cute templates from the current issue of Family Fun magazine. I've made felt food for the kids before, but was looking to do a quick, easy set this time around, because I'm up to my neck in unfinished projects right now. These fit the bill. I started them this afternoon, and finished them tonight.


These were constructed from felted sweaters. (Well, except for the yellow corn. You don't find a lot of bright yellow sweaters...) There were several pieces, like the garlic and onion that I didn't make, because I didn't have the right color felt. I'll be keeping an eye out at at the thrift store for a beige or white sweater.
Even if you've never sewn before, this would be an easy, easy project.
I'm putting this little set away for Christmas.

Saturday, November 6, 2010

Meet Brobeena

I picked up a McCall's pattern (number M5826, if you're interested,) a while back to make weird little toy monsters for the kids. On closer inspection, I noticed one of the body patterns looked a little like Brobee, from Yo Gabba Gabba.
I dived into my pile of partially disassembled wool sweaters today, and started working on some of Brobee's slightly eccentric relatives. :)


Here's the only one I managed to complete tonight. We've named it Brobeena.


It's a little wacky looking, (no mess ups on my part this time, it was supposed to be,)  but V loves it. She got to weigh in on some of the details, like the fact that she wanted it to have "mommy lips."

I used the body pattern as is, and added the horns, (ears? whatever they are,) and the facial features. It looks like you could also use one of the included patterns to make a pretty good Toodee, and with a few alterations, you could probably make Muno as well.

I have several more of Brobee's pals in the works.


handmade projects

Tuesday, October 5, 2010

WFMW: Sewing Tips for Newbies

When people find out that I can sew, I hear a lot of folks lamenting that they inherited a sewing machine, or picked one up at the thrift store, and don't know what to do with it.

I thought I'd post a few tips I wish I had known when I started sewing.

1) First of all, when you're buying a pattern, and cutting it out, don't pay attention to the size listed, pay attention to the measurements. You'll often find that the sewing pattern's version of a size 10 is more like a 6 or an 8 in off the rack clothes. This is due to the so called vanity sizing in off the rack clothes. (You know how you can usually go down a size in clothes from the Gap or Banana Republic? It's not that you've really lost weight without realizing it. ;) Their sizes run a bit bigger than normal, because people get a kick out of wearing a smaller size. This is also the reason why you'll probably wear a larger size in vintage clothes. Back in the day, they sized the clothing according to actual body measurements. But I digress.) It's a real drag to finish a project, only to find that it's never going to fit you. (I've done it. More than once.)

2) Pick something easy to start with. Throw pillows, pillowcases,  tote bags, simple elastic waist skirts, and pajama pants that don't have a lots of pockets and extra detailing are good starter projects. Picking an easy project to start with raises the odds that it will turn out well, which in turn will help you develop the skills and confidence to move on to harder things. It's pretty much not ever a good idea to decide that you're going to sew your wedding dress or your daughter's prom dress as a first project.

(I made these pj pants for the kids today, using McCall's pattern number M6194. It would make a great beginner pattern, with just 2 pieces, and no fussy details. I also deliberately made them a little big, hoping the kids might get a little more wear out of them, in case you're wondering. I'm cheap like that.)


3) Pay attention specifically to the cutting instructions on the pattern. If you don't, you may end up with pieces that have been cut out on the wrong side of the fabric. Sometimes the instructions will dictate that you'll pin the pattern piece right side up, and then again upside down, in order to to achieve a left and right sleeve for instance. It's complicated to explain here, but trust me on this. Read the directions. Then read them again.

4) When you're first starting out, threading the sewing machine is pretty intimidating. There are usually around 6 places you have to run the thread through, and it has to be done in the right order. My mother gave me this tip: Write the numbers 1-6 on a piece of tape, then place them on the appropriate spots on the machine, as shown below. Next time you go to thread the machine, it will be easy to figure out the order. Later, when you don't need the prompting any more, you can remove the tape.


5) I'm going to totally go against the consensus here, but if you just want to dip your toes into sewing, and see if you like it, I think it's fine to buy a cheap Singer sewing machine at a big box store. It won't last forever, it doesn't have as many bells and whistles, and it may not be up to quilting multiple layers of heavy fabric. It should, however get you through the first couple of years, while you learn how to sew, and decide if you like it. Later you can upgrade to a fancy machine, if you want one, or need one. Or not. $1000 is a lot of cash to drop on something you're not even sure if you're going to use.

6) Initially you may be tempted to think that basting, and pinning, and ironing are a lot of trouble, and maybe you don't really have to do them. They save a lot of time on the back end though, ripping out mistakes. Sewing is a little like cooking. Once you sort of know what you're doing, you can figure out ways to improvise. At first though, follow the directions to the letter.

7) The easiest fabric to get started with is going to be cotton. It doesn't stretch, it won't slip and slide while you're sewing it, and it's pretty forgiving if you have to rip out stitches. It's also inexpensive. You probably don't want to get started sewing on antique silk.

8) My final tip is this: the best way to learn to sew is to start sewing. Pick an easy pattern, some inexpensive fabric and go to town. When you mess up, (and you will mess up,) you can either try try to fix it, or scrap it and start over.

Do you have any tips to add to the list? I'd love for you to add them to the comments section.

For many more WFMW posts, check out http://www.wearethatfamily.com/

Saturday, September 11, 2010

Volcano Play Mat

Another felt play mat today, along the same lines as yesterday's. L had very specific instructions about this one. He wanted curvy roads, a volcano, and rocks.


We've been on toy burnout around here. The kids seem sick of everything.
I love that this little project made from stuff I had lying around has re awakened an interest in cars, at least temporarily. :)

Friday, September 10, 2010

Felt Car Play Mat

I love when I start making something for the kids, and they get so excited about it that they stand by the sewing machine, waiting for me to hurry up and finish it.


Heavily inspired by this project at Serving Pink Lemonade, I decided to whip up a little felt play mat for the kids. I didn't have any Wonder Under, or whatever she used, so I just sewed everything up on the machine. Her way looks a little neater, but in typical fashion, I wanted to do it NOW, so I just used what I had.


You may be wondering by now if L owns any shirts, since he's never wearing one. He does, but it's all I can do to get him to wear pants sometimes...

They kids are currently fighting over the play mat. I'm going to have to hurry up and crank out another.
(You should check out all the projects at Serving Pink Lemonade. Lots of good stuff there.)

Tuesday, August 3, 2010

Little Dresses For Africa


Several months ago, Kristen at We Are That Family posted a call for people to participate in a two part charity project, to benefit Little Dresses for Africa.

The first part of the project was a drive to collect pillowcases, sewing notions and shipping money. The second part of the project was that the donated supplies were mailed to a group of volunteer seamstresses, who then sewed the dresses, and mailed them off to the charity.

I was one of the volunteer seamstresses, and I'm happy to say that I mailed off 10 little dresses last week. I had fun working on them, and got to try out some of the embroidery stitches my new sewing machine does.

I hope the little girls like them.

Thursday, July 29, 2010

DIY Post Office Kit


We're actually going to be doing a mail carrier/mail unit study here next year, so this is going be useful for us, besides just being fun.

The way I see it, there are two routes you can go for this kit. For an older child, I'd put together an actual mail kit, complete with a book of stamps, some fun stationary, some stickers, a cool pen, and a list of relevant addresses, (grandma's, a favorite cousin's, etc.)
I may in fact do that anyway for L, who is just now getting interested in getting real mail.

For little ones, like V, a toy felt set seems like a better idea. Here's the simple set I put together for mine (constructed of felt, and machine sewn,) but if you're feeling a little more ambitious, here's a great tutorial for a more elaborate mail set.
I was going to try to construct a felt mailbox, and then thought better of it. I think we still have a couple of little tin mailboxes lying around here from Valentine's day.

Wednesday, July 28, 2010

DIY Pretend Flower Gardening Kit


After seeing this cute DIY Garden Center kit at Frugal Family Fun Blog a while back, I was inspired to create a somewhat less crafty and hopefully toddler friendly version for V.


My version includes:


A gardening apron from Dollar Tree.


A couple of bunches of flowers from Dollar Tree.


A little gardening kit from Tuesday Morning.


A totebag I made from some old fabric I had lying around.


For a total of about six bucks.


After I made up the little kit, I saw this other super cute variation of the idea at Sew Can Do. Now I'm thinking I need to whip up some seed packets and worms...

Thursday, July 22, 2010

Vintage Embroidery Giveaway


I've been sorting through craft supplies lately, and doing some major destashing, by way of using up stuff I have, and getting rid of stuff I'm just not going to use.
I recently ran across this cute little vintage Vogart embroidery kit (apparently from 1975,) purchased years ago, in some optimistic moment when I though I might learn to embroider. I never did, and here it still sits, in the unopened package. Someone should use it, and embroider these cute little fruit onto something...
Just for fun, I thought I'd offer it up as a little giveaway.
I tried on two separate occasions to take a decent picture of it, but couldn't. Oh well, take my word for it, it's cute.
If you're interested, leave me a comment telling me what crafty endeavor you're working on right now.
This giveaway is open to folks in the U.S., and will end 7/31/10, at midnight central time.

Friday, July 16, 2010

Assembly Line Tote Bags


I've been working on Christmas gifts since last month. Non crafters might think that's odd, but if you're planning on making most of your gifts, without having to operate a round the clock sweatshop in December, it pays to start early. I'm actually hoping to finish most of the crafting really early this year, so I can spend most of December goofing around, making stuff with the kids.
I've been making lots of tote bags as gifts. They're easy to make, easy to personalize, and a good way to use up small amounts of fabrics. (I'm sort of partial to the skeleton fabric. Cute, huh?)
I haven't been using a pattern for these. I just eyeballed a bag I had whose size I liked.
My sisters and nieces love bags of any and all kinds.

Thursday, July 8, 2010

Yep, Another Rockstar Birthday Banner


I posted several weeks ago about the U Rock Banner I made for my niece Madison's upcoming birthday. Here's another along the same lines.

She knows I've been working on this stuff, and she's getting excited. I hope she likes it...